Unity Engine - 3D Ruletile Voxel Tool
While working on a personal project, I wanted to simplify level creation by building a tool in-engine. Having experience with the tools from the 2D RuletTile package from Unity, I decided to use it’s basic 3D support as a foundation to build my own needs upon.
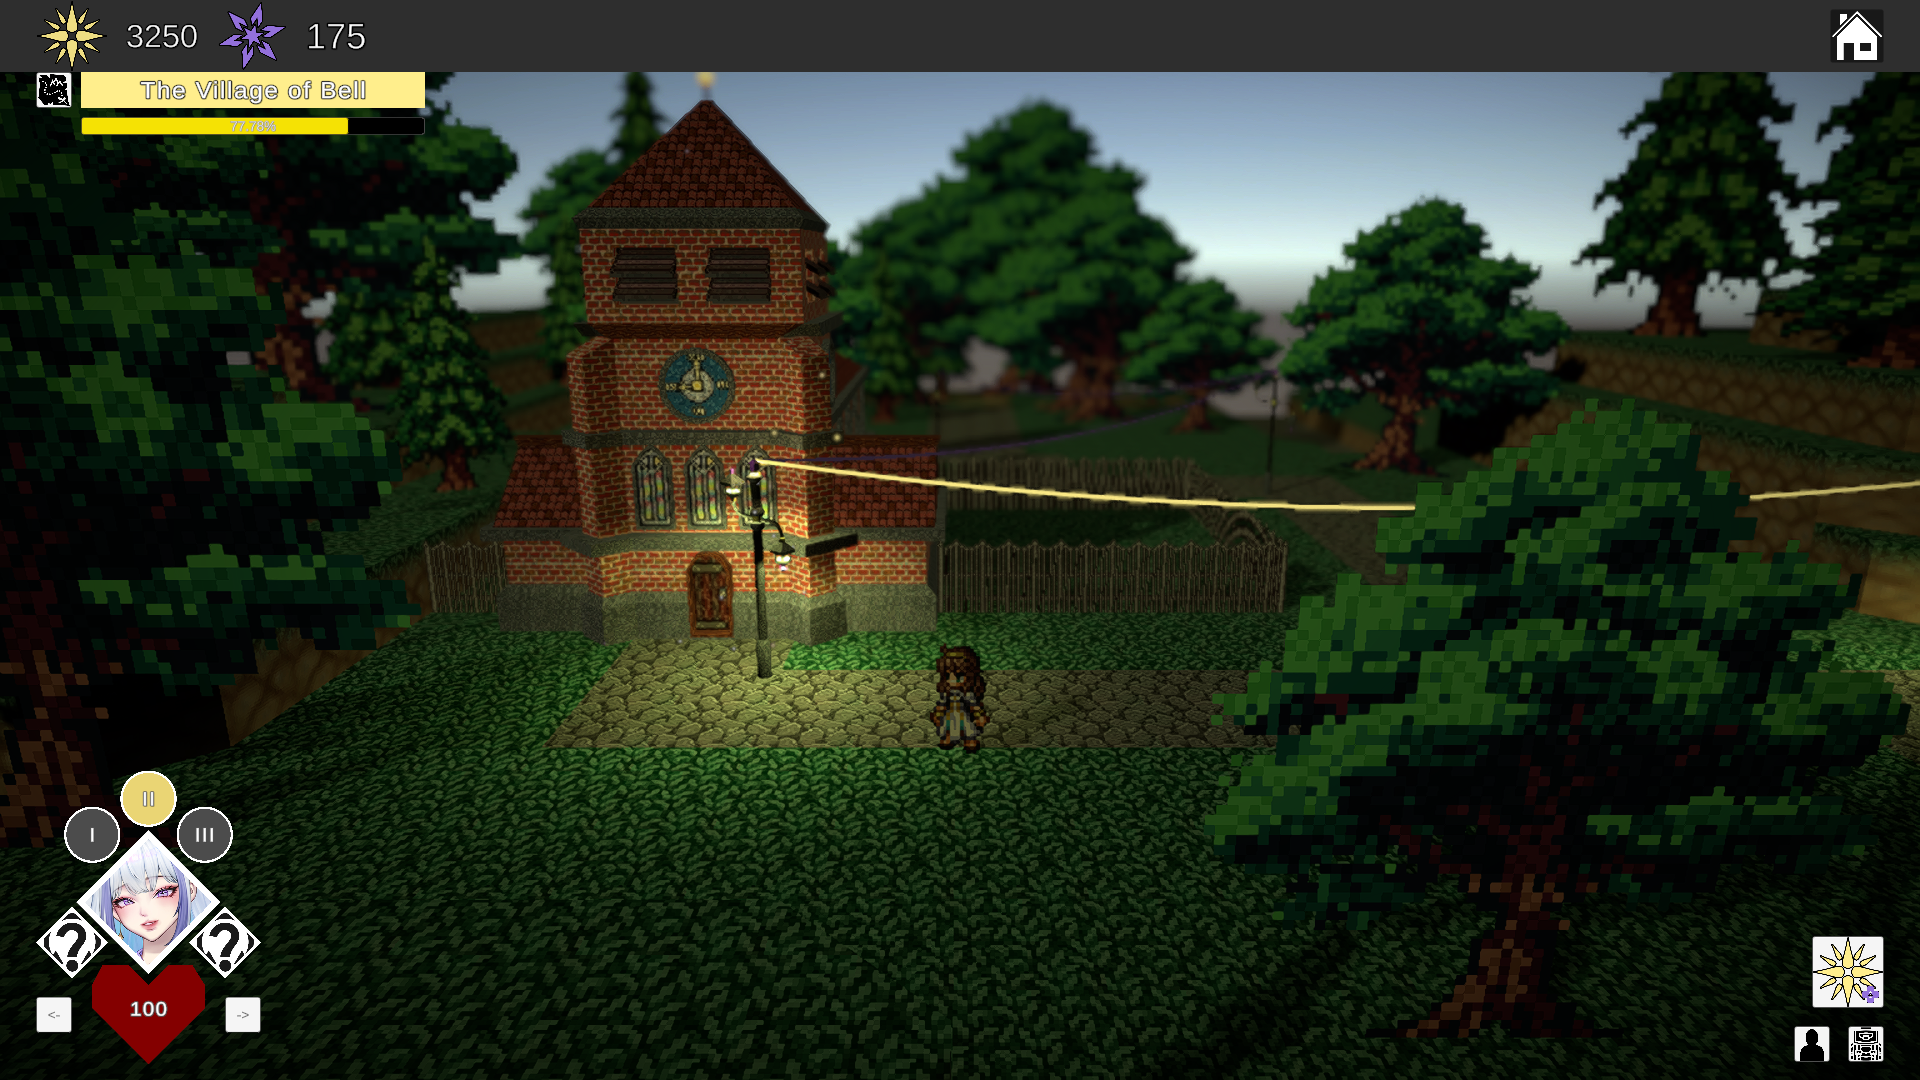
Screenshot of the prototype. The entire level is built using a modified version of Unity’s RuleTile package, augmented with personal scripts.
Premise
I wanted a similar aesthetic to the «Octopath Traveler» series by SQUARE-ENIX. Their patented «HD2D» look used 3D technology such as models, lighting and shaders combined with classic 2D pixel art to create something that is incredibly charming and nostalgic, while still staying up-to-date for a modern audience.
To achieve this look without having to manually create the level in external software like Autodesk 3ds Max or Blender, the developers leveraged a system that comes with Unreal Engine 4 to allow the Level Designers and artists to quickly build a base, then add custom set-pieces on top.
Their whole process was described in a talk at Unreal Fest Europe in 2019.
For my own project, I wanted to create similar tools to allow myself to create levels quickly.
The Unity Tilemap Editor
For 2D projects, Unity comes with an excellent package called the Unity Tilemap Editor, allowing developers to create pallets and quickly paint on a 2D plane.
An extended package can be installed alongside it, allowing more versatility through «RuleTiles», a system where tiles can check adjacent tiles on the grid and proceed to evaluate a set of rules they were given. If the rules match, the tile dynamically changes to a different texture, rotation, etc.
Naturally, since my project is 3D, the system did not initially support my needs, though it does come with some 3D support. For example, besides just textures, the system also allows the use of any GameObject prefab to be spawned. Even in RuleTiles! Since multiple grid objects can be used, layers of 3D objects are possible, but this causes additional challenges.
Identifying Limitations
With this base package tested, I began identifying where the limitations for 3D are and created a list:
Verticality
Tiles are not aware to tiles above or below them when using multiple grids.
Empty Space
Ruletiles only check whether an adjacent tile is the same or different. Beyond that, it can only check for rotation. There’s no «rule behaviour» based on whether the adjacent tile is «empty» or «not empty»
Collision
Unity supports a special 2D collider that stitches together the colliders of individual tiles, then optimizes it into a single Polygon Collider. There is no 3D equivalent for this system.
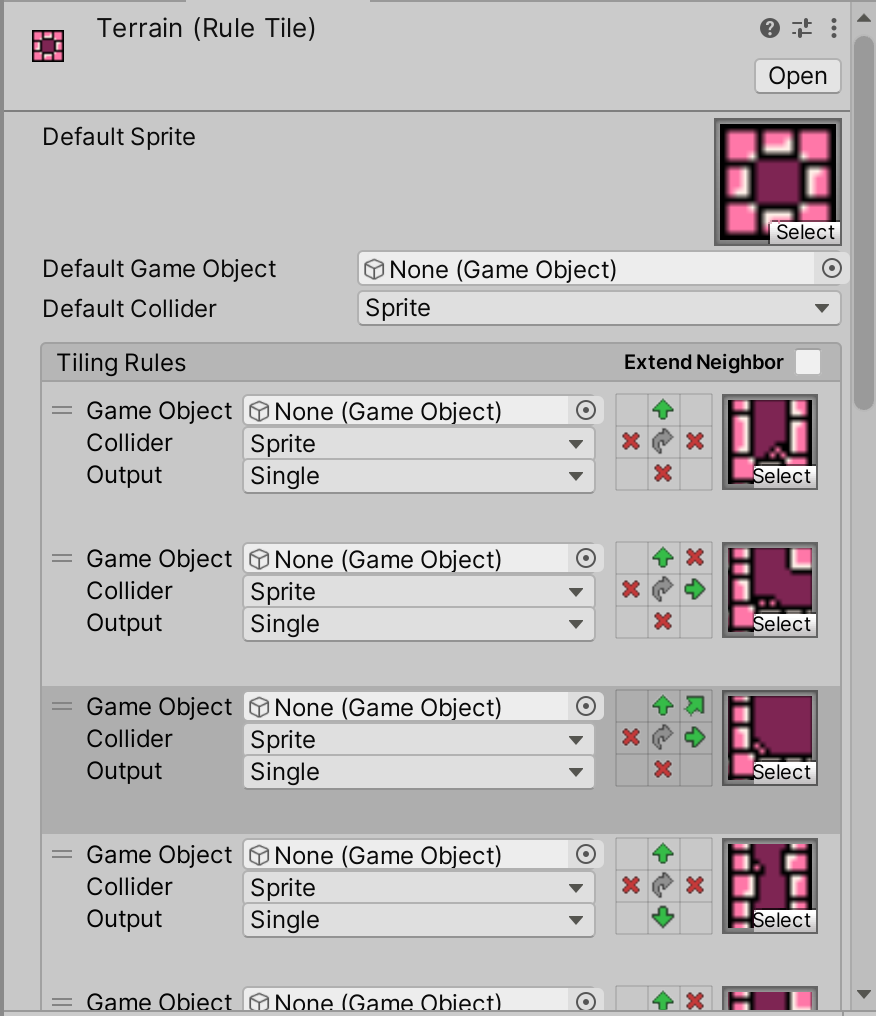
Ruletiles are a single tile containing multiple possibilities based on what the developer defines as “rules”.
Ruletiles can allow developers to quickly paint terrain or assets without having to manually swap textures, greatly increasing the speed of the workflow.
If the rule has definitions for the Z-axis, the Ruletile will check the <<linkedTilemaps>> to see what is there.
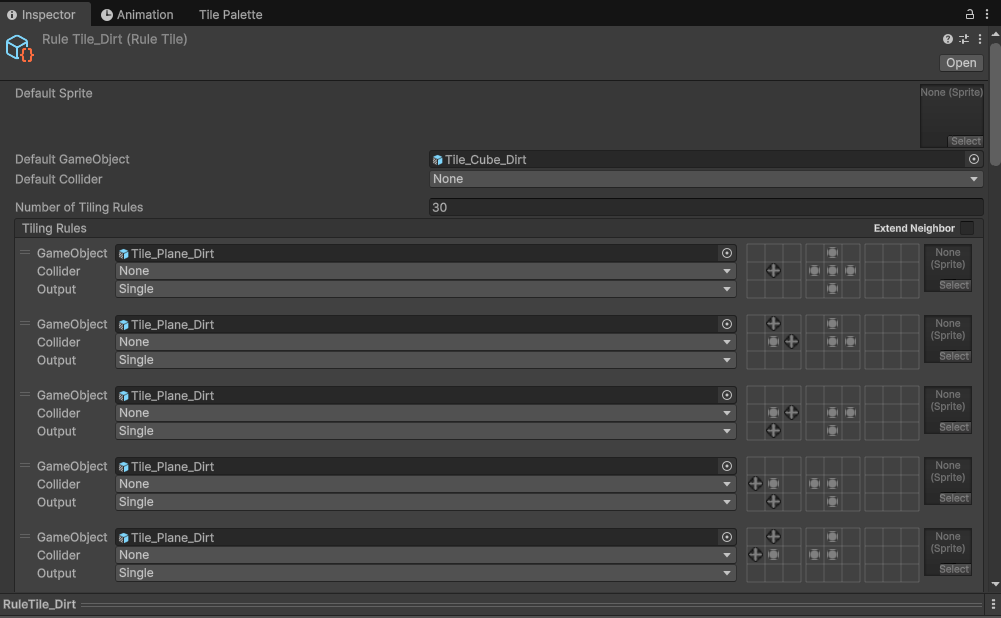
My modified RuleTile Editor window. The three 3x3 grids represent the layers: above, same and below respectively.
Solving Verticality
Because these Unity Tilemap packages come with the source code, I had a look to see what’s under the hood.
As if the Unity developers knew about people like me, a lot of the information for RuleTiles are stored as Vector3 data, despite only using the X and Y axis. This left the entire Z-axis available for what I needed. All values were always zero.
The first step I made was adding a basic script to each grid that contained references to two other grids, one above and one below. When a tile is placed, the rules will check if the reference for a grid above or below is valid, then check the tile on the defined position in that grid.
The RuleTile Editor
The Ruletile Editor uses a 3×3 grid to specify the adjacent tiles. I had to expand this Editor UI to add two additional 3×3 grids representing the «above» and «below» layers.
Fitting it all neatly in a layout was probably the bigger challenge, as most code could be copy pasted and linked to these values with a Z of +1 representing the upper layer and a Z of -1 being the lower one.
Solving Empty Space
To make 3D Ruletiles adapt, I needed a way to define «empty» and «not empty» space.
First, I went into the Editor Code to see how the 2D ruletiles operate. They simply check if an adjacent tile is the same or not the same.
I expanded it by adding two new possibilities: «null» and «not null».
This allows me to define the rules for corners, which use a diagonal slice to reduce the ‘blocky‘ aesthetic a bit, something that the people from «Octopath Traveler» mentioned as a challenge in their talk.
The result goes beyond just corners. If a 3D tile is entirely enclosed by adjacent tiles in all relevant spaces, the Ruletiles has a setting where it simply spawns an empty GameObject.
Essentially, while painting, the Ruletiles ensure that objects are automatically deleted if they’re completely obstructed from all sides, resulting in a ‘hollow’ level shell with only relevant geometry.
Using existing icons, I defined two new types of Neighbor that RuleTiles can take into account, and react appropriately.
Every tile uses a box box collider where possible. Corners and edges use a very simple mesh collider.
Solving Collision
This part is still an ongoing process. As I want to develop for mobile, optimization and performance are incredibly important.
Since movement is handled with Raycasts and NavMesh agents, the level needs a collider to return where the Raycast has hit. Additionally, Unity’s built-in NavMesh system does not recognize Ruletiles as valid renderers, so the only option to create the NavMesh is to use colliders.
Puzzle Pieces
I created the meshes for all Ruletile pieces in Blender and deleted all unnecessary geometry. Each tile currently uses a single collider.
To check if it was possible to merge the colliders efficiently, I asked on the Unity Forums. I was assured here that individual colliders are not as big of a performance hit as I initially feared, given that the only real physics checks are basically input.
I did not want to spend too much time optimizing prematurely, and so I left it in the current functional state. I was given a possible lead for later down the line involving a technique called «Greedy Meshing».
The Result
Every piece needed for the Ruletile was created manually in Blender.
Once I had every piece set up as a template, I created a basic, universal Triplanar shader to ensure the textures tiled neatly.
Once I was happy with the setup, and made a few final adjustments, I wrote an additional tool to automate the creation of all pieces for a specific texture.
With all this, Level Creation is a breeze! I can quickly map out geometry using a tool I’m familiar with, directly inside the Unity Engine with the ability to swiftly create new tiles.
The Future
Since the prototype is still in very early stages, a lot can change. More optimizations can be made, and I want to continue improving the aesthetic.
In order to combat the current ‘blocky’ aesthetic, new tileable pieces with more varied geometry can be added and then randomized while painting to break up the current, straight cliffs, close to what «Octopath Traveler» does.
All in all I am very pleased with the system doing exactly what I need, without restricting the potential for future iteration.